Build a repeatable onboarding system that activates clients faster and drives long-term retention
Learn how to build a client onboarding process that boosts nutrition service revenue. This step-by-step tutorial covers welcome sequences, automated check-ins, and retention strategies that turn new subscribers into loyal paying members.
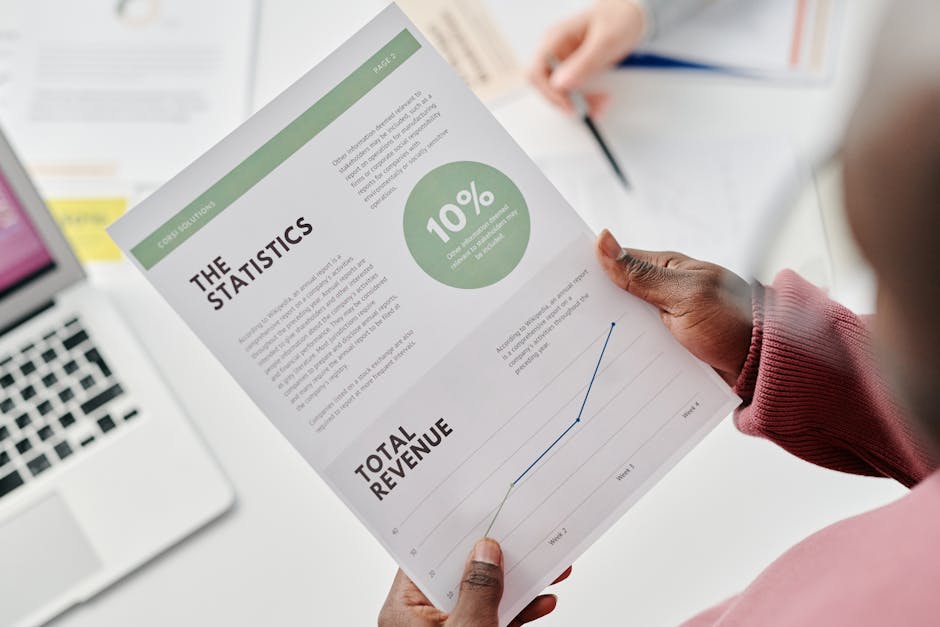
TL;DR
Define a 24-hour quick win - Every new client should receive a personalized meal plan and shopping list within 24 hours of signing up. Speed of value delivery is the strongest predictor of retention.
Automate your welcome sequence - Three emails (immediate confirmation, 6-hour deliverable, 24-hour check-in) handle the critical first day without manual effort from you.
Use templates, not custom builds - Start with 4 meal plan templates covering your most common client profiles. Customize portions and swap recipes based on intake form data. This is how you scale nutrition service revenue without burning out.
Build check-ins into the first week - Touchpoints on Days 3, 5, and 7 reduce early churn and create opportunities for referrals. Silence in the first three days is the top predictor of cancellation.
Deliver through a branded platform, not static files - A branded app or membership portal creates an ongoing, interactive experience that supports retention, upsells, and community building far better than emailed PDFs.
What You Will Achieve: A Revenue-Generating Client Onboarding System
By the end of this tutorial, you will have a fully functional client onboarding process that transforms first-time subscribers into long-term paying members of your nutrition service. Instead of relying on sponsored content deals that fluctuate with algorithm changes, you will own a repeatable system that increases nutrition service revenue through better client activation, faster value delivery, and higher retention.
Your success criteria are clear: a welcome sequence that guides new clients from sign-up to their first personalized meal plan within 24 hours, an automated check-in loop that reduces early churn, and a branded experience that makes clients want to stay (and refer others). This is how you move from trading posts for paychecks to building a scalable nutrition business.
Prerequisites and Setup Checklist
Before you begin building your onboarding system, confirm you have the following in place. Missing any of these will slow you down or create gaps in the client experience.
An existing audience (500+ email subscribers or social followers actively engaging with your nutrition content)
A defined service offering (meal plans, macro coaching, dietary guidance, or a combination)
An email marketing platform (compare options suited for content creators here)
A payment processor (Stripe, PayPal, or a platform with built-in billing)
A delivery method for meal plans (app, membership portal, or PDF, though we will address why some formats outperform others)
60 to 90 minutes to complete all steps in this tutorial
Potential blocker: If you are still delivering meal plans as static PDFs, Step 5 will be especially important for you. Static PDFs create hidden scaling problems that undermine onboarding quality.
Why Client Onboarding Is Your Highest-Leverage Revenue Move

Most food content creators and nutrition coaches focus on acquiring new clients. That is expensive. The real leverage sits in what happens in the first 48 hours after someone pays you. A strong client onboarding process reduces refund requests, increases plan adherence, and creates the conditions for upsells and referrals. In fact, research shows that companies with a structured onboarding process see a 63% year-over-year improvement in customer satisfaction.
This tutorial uses a "quick win" onboarding philosophy: get clients to experience a tangible result (their first customized meal plan, shopping list, or coaching interaction) as fast as possible. We are not building a complex funnel. We are building a reliable bridge between "I just signed up" and "This was worth every dollar."
Alternative approaches (drip content over weeks, lengthy intake forms) exist, but data from the broader nutrition market supports speed. The U.S. diet and nutrition apps market generated USD 673.4 million in revenue in 2024, growing at 11.6% CAGR. The platforms winning in this space prioritize instant value delivery, and your onboarding should do the same.
Step 1: Define Your Onboarding Outcome in One Sentence
Before you build anything, write a single sentence that describes the outcome your new client will experience within 24 hours of signing up. This sentence becomes the north star for every onboarding decision.
Action: Open a document and type: "Within 24 hours of joining, my client will [specific outcome]." Replace the bracket with a concrete deliverable.
Examples:
"Within 24 hours of joining, my client will have a 7-day meal plan customized to their dietary restrictions and a complete shopping list."
"Within 24 hours of joining, my client will complete their nutrition profile and receive their first macro-precise meal plan inside the app."
Checkpoint: Your sentence should include a specific timeframe, a specific deliverable, and a personalization element. If it reads like a vague promise ("my client will feel supported"), rewrite it with measurable specifics.
Common failure: Trying to promise too much. If your 24-hour outcome requires you to manually build a custom plan for every client, you will burn out at 10 clients. The outcome must be deliverable at scale.
Step 2: Build a Streamlined Intake Form
Your intake form is the first interaction a paying client has with your service. It needs to collect enough information to personalize their experience without creating friction that causes drop-off.
Action: Create a form (Google Forms, Typeform, or your platform's built-in form) with exactly these fields:
Name and email (pre-filled if possible)
Primary nutrition goal (weight loss, muscle gain, general health, medical dietary need)
Dietary restrictions or allergies (dropdown with common options plus a free-text field)
Household size (affects meal planning and shopping lists)
Cooking skill self-assessment (beginner, intermediate, confident)
Checkpoint: The form should take under 3 minutes to complete. Time yourself filling it out. If it takes longer, cut fields.
Common failure: Asking too many questions upfront. Detailed macro preferences, medical history, and food logging habits can come later. Right now, you need the minimum data to deliver that 24-hour outcome from Step 1.
Step 3: Create Your Welcome Sequence
The welcome sequence is a series of 3 emails sent automatically after a client completes their intake form. This sequence does three things: confirms their decision, sets expectations, and delivers the first piece of value.
Action: Set up the following automated emails in your email marketing platform:
Email 1: Immediate (within 5 minutes of form submission)
Subject line: "You're in. Here's what happens next."
Body: Thank them by name. Confirm what they will receive and when. Include a direct link to access their meal plan or app. Keep this under 150 words.
Email 2: 6 hours after Email 1
Subject line: "Your first meal plan is ready" or "Quick start guide inside"
Body: Deliver or link to their personalized meal plan. Include their shopping list. Add one practical tip (e.g., "Start with Monday's dinner. It takes 20 minutes and uses only 6 ingredients.").
Email 3: 24 hours after Email 1
Subject line: "How did your first meal go?"
Body: Ask a single question to prompt engagement. Offer a quick link to message you or access community support. Reinforce the value of what they have already received.
Checkpoint: Send yourself test emails. Verify every link works, the timing is correct, and the tone feels personal rather than corporate.
Common failure: Making Email 1 too long or promotional. The client already bought. This email exists to reduce anxiety and build confidence, not to sell.
Step 4: Design the "Quick Win" Deliverable
The quick win is the tangible result your client receives within the first 24 hours. For nutrition services, this is almost always a personalized meal plan with an automated shopping list. The quality and speed of this deliverable determines whether clients stay past their first week.
Action: Build a template meal plan system that can be customized based on the intake form responses from Step 2. You need templates for your most common client profiles:
Template A: Weight loss, no restrictions, beginner cook
Template B: Weight loss, common restrictions (gluten-free, dairy-free), intermediate cook
Template C: Muscle gain / performance, no restrictions
Template D: General health / family meals, mixed dietary needs
Each template should include 7 days of meals, a consolidated shopping list, and prep notes. These are your base templates. You customize portions, swap specific recipes, and adjust macros based on each client's intake responses.
Checkpoint: Can you go from a completed intake form to a delivered, personalized meal plan in under 30 minutes? If not, your templates need more structure or your delivery method needs upgrading.
Common failure: Building every plan from scratch. This is the single biggest bottleneck that prevents nutrition coaches from scaling. Templates with smart customization are the answer.
Step 5: Choose a Scalable Delivery Platform
How you deliver meal plans directly affects client experience, retention, and your ability to grow nutrition service revenue without burning out. This step is where many coaches get stuck because they default to what is familiar rather than what scales.
Action: Evaluate your current delivery method against these criteria:
Personalization: Can clients see plans tailored to their preferences without manual rebuilds?
Accessibility: Can clients access plans on mobile, at the grocery store, while cooking?
Automation: Are shopping lists generated automatically? Can plans update without you re-sending files?
Branding: Does the experience feel like your brand, or does it feel like a generic tool?
Retention features: Can clients interact with your content over time, or is it a one-time download?
If you are currently emailing PDFs or sharing Google Docs, you will hit a ceiling quickly. A branded app or membership portal solves most of these problems. Member Kitchens, for example, lets nutrition professionals and food creators launch a branded meal-planning app without any coding, complete with automated shopping lists and customizable layouts. This kind of platform turns your onboarding deliverable into an ongoing, interactive experience rather than a static file.
Checkpoint: After this step, you should have a delivery platform selected and your template meal plans loaded into it. A new client should be able to access their plan within minutes of you assigning it.
Common failure: Over-researching platforms and never committing. Pick one that meets at least 4 of the 5 criteria above, and move forward. You can always migrate later.
Step 6: Set Up the 7-Day Check-In Loop
The first week is when most clients decide (consciously or not) whether they will stay. A structured check-in loop keeps them engaged and gives you data to improve your service.
Action: Create the following automated touchpoints:
Day 3: Short email or in-app message asking, "What has been the easiest meal so far?" (Positive framing encourages engagement.)
Day 5: Share a bonus recipe or tip related to their stated goal. This feels like unexpected value.
Day 7: Send a brief check-in survey (3 questions max): How satisfied are you? What would you change? Would you recommend this to a friend?
Checkpoint: Map out these touchpoints in your email platform or nutrition coaching tools dashboard. Verify that each message triggers correctly based on the client's sign-up date.
Common failure: Skipping the Day 3 check-in. Silence in the first three days is the strongest predictor of early cancellation. Even a simple, friendly message dramatically improves retention.
Step 7: Build a Referral Trigger Into Onboarding
Happy clients in their first week are your best marketing channel. But they will not refer others unless you make it easy and timely.
Action: At the end of your Day 7 check-in email (from Step 6), add a referral prompt:
"Know someone who would love a plan like yours? Share this link and they will get [specific incentive, e.g., a free bonus recipe pack]. You will get [specific reward, e.g., a free week added to your membership]."
Create a simple referral tracking system. This can be as straightforward as a unique discount code per client or a dedicated referral link through your payment platform.
Checkpoint: Test the referral flow yourself. Click the link, verify the incentive applies, and confirm you can track who referred whom.
Common failure: Offering vague incentives ("share with friends!") without a concrete reward. Specificity drives action. "Get a free bonus meal prep guide" outperforms "get a surprise gift" every time.
Step 8: Automate Plan Renewal and Upsell Opportunities
Onboarding does not end when the first week is over. The transition from "new client" to "retained member" requires a deliberate handoff into your ongoing service.
Action: Set up the following automations:
Day 10: Send a preview of next week's meal plan. This creates anticipation and reinforces the value of staying subscribed.
Day 14: Offer an upsell or upgrade (e.g., a premium tier with 1:1 coaching calls, a family meal plan add-on, or access to a private community).
Day 21: Request a testimonial. Clients who have completed three weeks are invested enough to provide meaningful feedback.
For food content creators exploring multiple monetization strategies beyond sponsored content, this upsell step is where recurring revenue compounds. Each retained client represents predictable monthly income rather than a one-time transaction.
Checkpoint: Verify that your billing system handles renewals automatically and that upsell emails link directly to upgrade pages with no extra steps required.
Common failure: Not having a clear upsell ready by Day 14. If you wait until a client asks for more, you have already missed the window of peak enthusiasm.
Configuration and Customization

Your onboarding system has several variables you should adjust based on your specific audience and service model.
Timing Variables
Email 2 delay (default: 6 hours): If your audience is primarily in one time zone, adjust so Email 2 arrives during a morning or early evening window when meal planning feels relevant.
Check-in frequency (default: Days 3, 5, 7): For higher-priced services ($100+/month), increase to daily touchpoints in the first week. For lower-priced memberships, the default is sufficient.
Content Variables
Number of meal plan templates (default: 4): Start with 4. Expand to 8 or more as you identify additional common client profiles. Do not try to cover every edge case on day one.
Referral incentive (must change): Do not use the placeholder examples. Choose incentives that cost you little but feel valuable to clients (bonus content, extended access, exclusive recipes).
Platform Variables
Delivery format: If you use a branded app, ensure push notifications are enabled for meal plan delivery and check-ins. Push notifications have significantly higher open rates than email alone. In fact, push notifications average 45–90% open rates, compared to just 15–30% for email.
Branding: Your onboarding emails, app interface, and meal plans should use consistent colors, fonts, and tone. Clients should never feel like they have left your ecosystem.
Verification and Testing
Before launching your onboarding system to real clients, run a complete end-to-end test.
Test procedure:
Sign up as a test client using a secondary email address.
Complete the intake form and verify data flows correctly to your system.
Confirm Email 1 arrives within 5 minutes.
Fast-forward through the sequence (manually trigger each email) and verify all links, attachments, and meal plan access points work.
Test the referral link and confirm the incentive applies correctly.
Process a test payment and verify the renewal automation triggers.
Edge cases to verify: What happens if a client does not complete the intake form? (They should receive a reminder after 12 hours.) What happens if a client selects multiple dietary restrictions? (Your template system should handle combinations without breaking.)
Success definition: A test client can go from sign-up to personalized meal plan access in under 30 minutes with zero manual intervention from you beyond the initial template customization.
Common Errors and Fixes for Your Client Onboarding Process
Error: "Clients sign up but never open their meal plan"
Cause: Email 2 is getting buried in inbox clutter, or the link to access the plan requires too many clicks.
Fix: Add the meal plan access link to Email 1 as well. Use a direct, one-click link. If using an app, include download instructions with screenshots in the immediate welcome email.
Error: "High refund rate in the first week"
Cause: The gap between what clients expected and what they received is too large. Usually this means the quick win deliverable feels generic.
Fix: Review your intake form. Add one question about their biggest frustration with previous meal plans. Use that answer to add a personalized note to their first plan ("I noticed you mentioned struggling with weeknight dinners. I have front-loaded easy 20-minute recipes for Monday through Wednesday.").
Error: "Clients engage in week one but cancel by week three"
Cause: Onboarding energy fades and there is no ongoing engagement loop after the initial sequence.
Fix: Extend your automated sequence through Day 30. Add a "Month 1 Progress" email with a summary of what they have accomplished. Introduce community elements (a private group, live Q&A sessions) that create social accountability.
Error: "Intake form completion rate is below 60%"
Cause: The form is too long, loads slowly, or is not mobile-optimized.
Fix: Cut the form to 5 fields maximum. Test it on a mobile device. Ensure it loads in under 3 seconds. Add a progress indicator if using a multi-step form.
Error: "Referral link generates clicks but no conversions"
Cause: The referral landing page does not clearly communicate the offer, or the incentive is not compelling enough.
Fix: Create a dedicated referral landing page (not your generic homepage) that mirrors the language of the referral email. Make the incentive immediate and tangible.
Next Steps and Extensions
With your onboarding system running, you now have a foundation to build on. The U.S. clinical nutrition market is projected to reach USD 37.4 billion by 2034, and creators who build scalable systems now will capture a meaningful share of that growth.
Consider these extensions to expand your revenue further:
Add a group coaching tier: Use onboarding survey data to group clients with similar goals, then offer a premium community experience with weekly live calls.
Launch a membership platform with tiered pricing: Offer a basic meal plan tier and a premium tier with personalized macro adjustments, grocery delivery integrations, and priority coaching access.
Create a "graduate" program: Clients who complete 90 days can transition to a lower-cost maintenance plan, reducing churn while keeping them in your ecosystem.
Each of these extensions uses the same onboarding infrastructure you just built. The intake form, welcome sequence, check-in loop, and referral system all apply. You are not starting over. You are layering revenue on a proven foundation.
Frequently Asked Questions
What is a Meal Planning SaaS and how does it work?
A Meal Planning SaaS (Software as a Service) is a cloud-based platform that lets nutrition professionals create, customize, and deliver meal plans to clients through a digital interface. Instead of building plans in spreadsheets or PDFs and emailing them manually, you use the software to manage templates, automate shopping lists, and give clients access through a web portal or branded app. Clients log in, see their plans, and interact with your content on an ongoing basis.
How can I scale my nutrition services using SaaS solutions?
Scaling starts with replacing manual, one-to-one tasks with systems. A SaaS platform handles meal plan delivery, client intake, automated shopping lists, and progress tracking without requiring you to do each step by hand. This lets you serve 50 or 500 clients with roughly the same effort it took to serve 10. The key is building reusable templates and automated onboarding sequences, exactly as outlined in this tutorial.
When is the right time to switch from spreadsheets to nutrition software?
If you are spending more than 30 minutes per client on meal plan creation and delivery, or if you have more than 15 active clients, spreadsheets are costing you growth. The right time to switch is before you feel overwhelmed, not after. Transitioning while your client base is manageable lets you test and refine your system without risking the experience of hundreds of paying members.
Which features are essential in nutrition coaching tools for onboarding?
At minimum, look for automated client intake forms, customizable meal plan templates, auto-generated shopping lists, mobile accessibility, and branded delivery (so clients see your logo and colors, not a generic platform). Bonus features that improve retention include push notifications, progress tracking, and community or messaging capabilities built into the platform.
How does a branded app improve client retention compared to PDFs?
A branded app creates an ongoing relationship. Clients open it daily for recipes, shopping lists, and updates. PDFs are opened once and forgotten. Apps also allow you to push new content, send reminders, and update plans in real time without requiring clients to download a new file. This ongoing touchpoint is what turns a one-time purchase into a recurring subscription.
How much revenue can a nutrition onboarding system generate?
Revenue depends on your pricing and retention rate. A creator charging $29/month who onboards 50 clients with a 70% retention rate generates roughly $1,015/month in recurring revenue. At 200 clients with the same retention, that grows to $4,060/month. The onboarding system described in this tutorial is specifically designed to push retention above 70% by delivering fast value and maintaining engagement through the critical first 30 days.
Sources
https://memberkitchens.com/blog/email-marketing-services-that-are-great-for-content-creators
https://memberkitchens.com/blog/hidden-cost-static-meal-plan-pdfs
https://www.grandviewresearch.com/horizon/outlook/diet-and-nutrition-apps-market/united-states
https://www.gminsights.com/industry-analysis/us-clinical-nutrition-market
https://memberkitchens.com/blog/5-best-alternatives-to-patreon-for-food-creators